

Next post


Somewhere in the dark hole that is my computer, I SWEAR I had “before” pictures of this nightstand, but who knows if I’lll ever find them? So let me just tell you, this thing was NOT pretty. My husband tried to send it right back to the garbage when he saw me toting it inside, and I had to convince him it had good bones underneath all three layer of tacky spray paint, broken doors and loose screws.
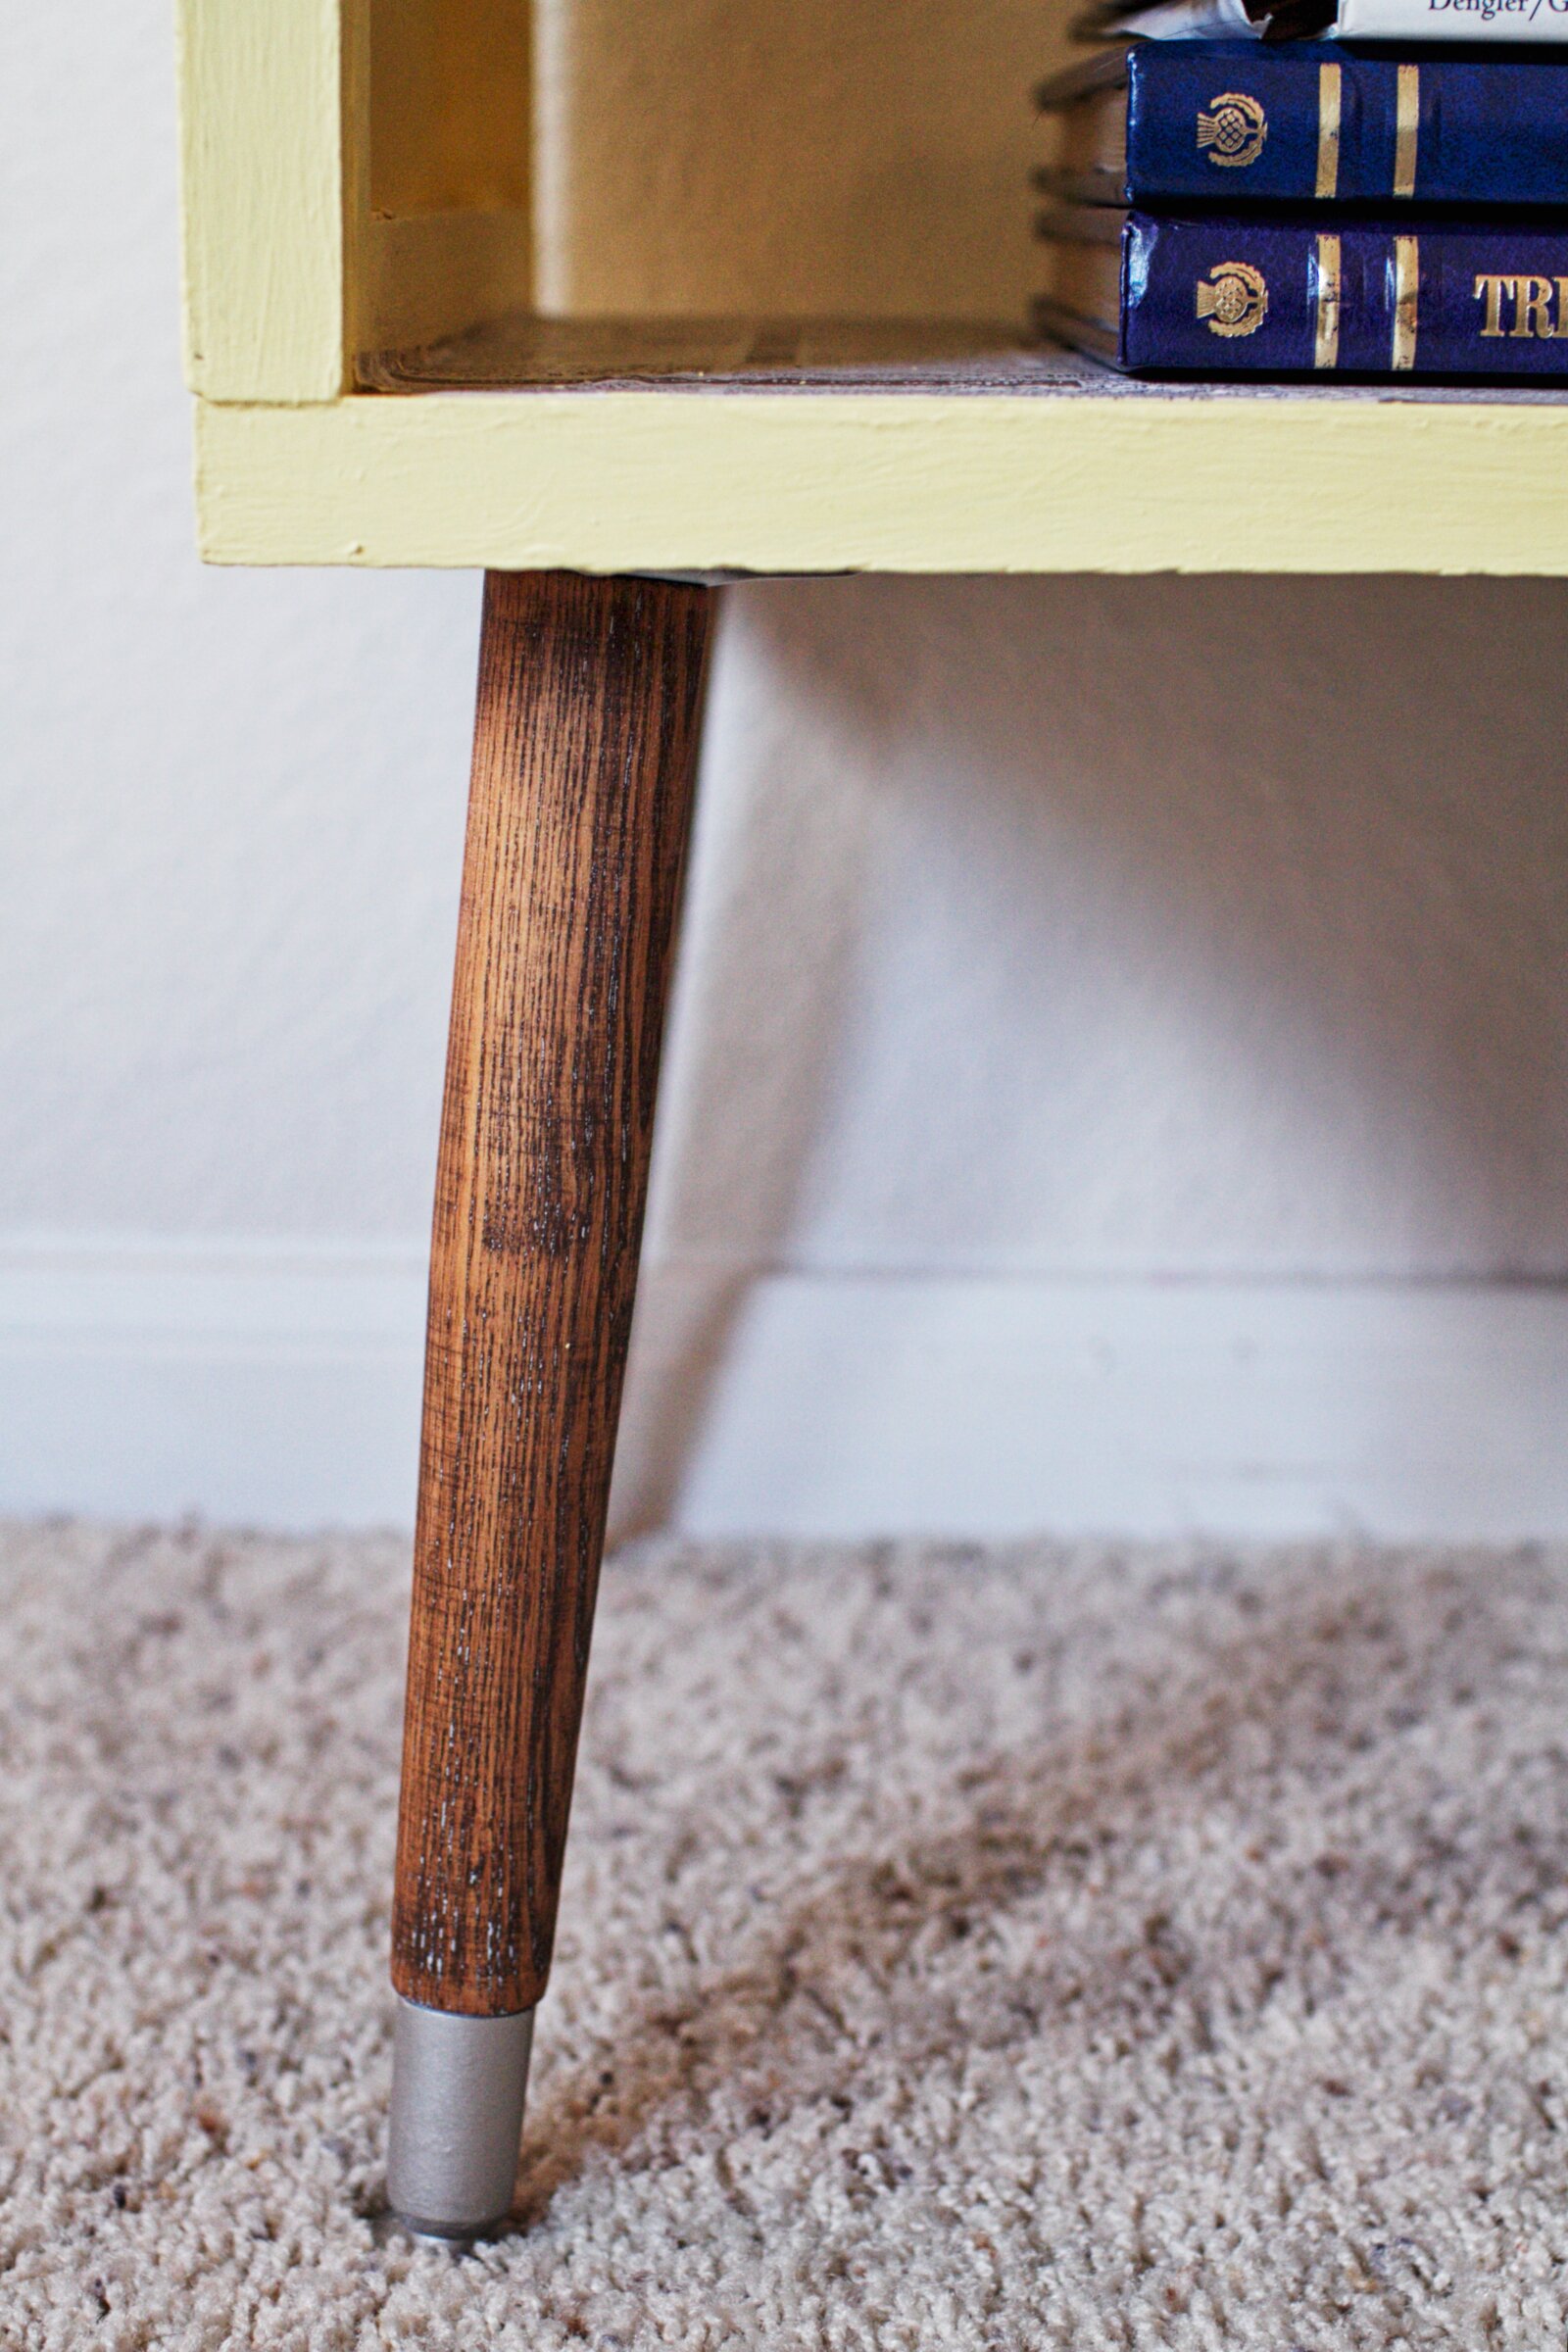
I replaced my daily monthly workout with 30 minutes of sanding the table legs to reveal this pretty natural wood. I put masking tape around the bottom of the legs and spray painted the feet silver. It took a few coats of spray paint. Lastly, I polished up the legs with a dab of coconut oil on a lint free cloth.


I was really pretty nervous about the lining inside. I wanted to add a little flare instead of painting it all yellow. This adorable tissue paper filled with happy quotes was on sale at a local craft store. Black + White+ Yellow is one of my favorite color schemes, so it seemed to be a match made in heaven! The tissue paper was very thin, so I did put layers. I painted craft glue on the back of each sheet, then after placing it on the table I topped it with LOTS of Mod Podge.

All that the rest of the table needed was a lot of sanding, two layers of chalk paint, and some matte wax sealant.

I never thought I’d see a day that I allowed faux flowers in my house, but they are a heck of a lot easier to deal with in a three year olds room than live ones are!
Have any questions about this DIY? Leave them in the comments!


 01
01
 02
02
 03
03


 nice job!! 😜😄 . . . . . . . . . . . . . . . . #sanantonio #tx #hemisfairpark #family #portraits #photography #kids #parents #children #lifestyle #blogger #annaangenend #followme #booknow #canon #colorefexpro #candidchildhood #autumn #2016 #holidays")

 . . . . . . . . . . . . . . . #photography #lifestyle #blogger #followme #booknow #annaangenend #sanantonio #newbraunfels #tx #hellofall #autumn #2016 #fun #pumpkinpatch #seasonal #kids #children #portraits #boys #parenting #momtogs #clickinmoms #momswithcameras #childhoodmemories #childhoodunplugged #candidchildhood")
Leave a Reply